
You can make your own self-rising flour at home using three simple ingredients. It’s perfect for all your favorite baking recipes.

So you finally decided to make that cornbread recipe you’ve been wanting to try. But the recipe calls for self-rising flour. You quickly realize you don’t have any in your pantry, and it seems all hope is lost.
Well, fear not! I’m about to show you how to make a self-rising flour substitute made with some very common pantry staples. Rest assured, you’ll be back to baking in no time without missing a beat.
Personally, I love making this whole wheat beer bread using this self-rising flour. It’s quick, always ready to go, and eliminates a few steps.

What is self-rising flour?
Self-rising flour is a type of flour that has baking powder and salt already mixed into it. It’s very popular in Southern recipes.
This combination makes it a convenient ingredient for recipes that require leavening, such as biscuits, pancakes, cake mixes, and quick breads. The baking powder acts as a leavening agent, helping baked goods rise without the need for additional ingredients like baking soda or yeast. The salt adds flavor.
Most store-bought brands, such as White Lily flour and Martha White, use bleached flour. Bleached flour has a lower protein content and supposedly helps to give baked goods a fluffy texture. However, I have found that using unbleached flour to make my own self-rising flour does just as well.
The main difference between all-purpose flour and self-rising flour lies in their ingredients and usage:
- All-Purpose Flour – Basically, it’s just plain flour with nothing added to it. It’s made from a blend of hard and soft wheat; it contains only ground wheat without any added leavening agents or salt. It is very versatile and can be used in a wide range of recipes, including baking, cooking, and thickening sauces. When used in recipes that require rising, you typically need to add a leavening agent like baking powder or baking soda.
- Self Rising Flour – Contains all-purpose flour, baking powder (a leavening agent), and salt. It’s designed for recipes that require a leavening agent, such as biscuits, pancakes, and certain types of cakes. It provides a convenient option because the leavening and salt are already included, eliminating the need for additional measurements.
The key difference is that self-rising flour has leavening agents and salt pre-mixed, while all-purpose flour does not, allowing for more versatility and control in recipes.

Ingredients you’ll need
- Flour: I used organic unbleached all-purpose flour for this recipe. My favorites are King Arthur Flour and Bob’s Red Mill. Whole wheat flour and pastry flour can also be used.
- Baking powder
- Salt: Use fine salt or kosher salt. You can leave this out if you wish because it’s simply used for flavor. Omitting the salt will not affect the rise of the recipe.
NOTE: Full details can be found below in the recipe card.

How to make homemade self-rising flour
This homemade self-rising flour recipe is an easy substitution and just as good as any store-bought self-rising flour.
- Measure out the flour very carefully for every cup of self-rising flour your recipe calls for.
- To a large mixing bowl, add 1 cup of flour, 1 ½ teaspoons of baking powder, and ¼ teaspoon of salt.
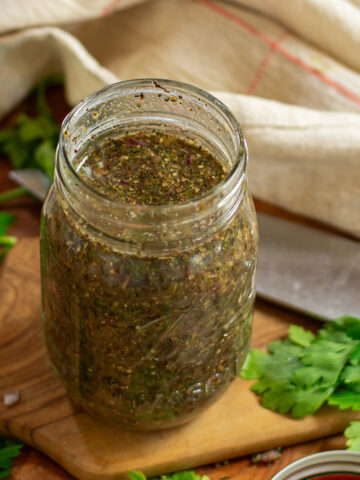
- Whisk the ingredients thoroughly for at least 30 seconds. Transfer to a glass jar or airtight container and store in your pantry or other dry place.

Can I make gluten-free self-rising flour?
When you’re looking to replace wheat-based self-rising flour with a gluten-free option, it’s important to choose a 1:1 gluten-free flour blend. This is different from regular gluten-free all-purpose flour. Look for xanthan gum in the ingredients, as it helps bind everything together.
To make the substitution, start with an even cup of the 1:1 gluten-free flour blend for each cup of self-rising flour your recipe requires. Then, mix in 1½ teaspoons of baking powder and ¼ teaspoon of kosher salt. Whisk it all together, and you’re set!
What’s the best way to store self-rising flour?
I prefer to make self-rising flour in smaller batches as I need it, but you can also make a bigger batch so you will always have it ready to go.
That being said, storage is crucial. You’ll want to keep your homemade self-rising flour in an airtight container or glass jar in a cool, dark place like your pantry. Your refrigerator or freezer are good options as well. Properly stored, your flour will be good for up to 6 months.
Top tips when working with homemade self-rising flour
A few things to think about when making and using your own self-rising flour.
- Always measure properly and accurately. The best way to do this is by weight with a food scale. If you don’t have a scale, an easy way to measure is simply to spoon the flour into a measuring cup until it overflows and level it off with a knife.
- Use it or lose it! You should use your self-rising flour within six months, or the baking powder will lose its strength and effectiveness.
- Soda. If a recipe calls for baking soda, DO NOT omit it! Baking soda and baking powder do not respond the same way and are not the same thing.
- Salt. If you are making any recipes that call for salt, like yeast bread recipes, you will want to omit that ingredient because of the salt in the flour.

Did You Like This Recipe?
Please leave a comment below with a star rating, and for recipes to be saved, check out my Facebook page, Instagram page, or Pinterest.
The recipes are free but donations and tips are more than welcome and help to keep this site running.
CLICK here to donate and show your support!
How To Make Self-Rising Flour: A Quick And Easy Guide
- Total Time5 minutes
- Yield4 servings 1x
- DietVegan
Learn how to make your own self-rising flour at home with this simple guide. With just a few ingredients, you’ll have a pantry staple for all your baking needs.

Ingredients
- 1 cup organic unbleached all-purpose flour (whole wheat flour and pastry flour can also be used)
- 1 ½ teaspoons of baking powder
- ¼ teaspoon of salt
Instructions
- Measure out the flour very carefully for every cup of self-rising flour your recipe calls for.
- To a large mixing bowl, add 1 cup of flour, 1 ½ teaspoons of baking powder, and ¼ teaspoon of salt.
- Whisk the ingredients thoroughly for at least 30 seconds. Transfer to a glass jar or airtight container and store in your pantry or other dry place.


Notes
You’ll want to keep your homemade self-rising flour in an airtight container or glass jar in a cool, dark place like your pantry. Your refrigerator or freezer are good options as well. Properly stored, your flour will be good for up to 6 months.
When you’re looking to replace wheat-based self-rising flour with a gluten-free option, it’s important to choose a 1:1 gluten-free flour blend. This is different from regular gluten-free all-purpose flour. Look for xanthan gum in the ingredients, as it helps bind everything together.
Whole wheat flour and pastry flour can also be used.
Nutrition
- Serving Size: ¼ cup
- Calories: 124
- Sugar: 0 g
- Sodium: 148.7 mg
- Fat: 0.5 g
- Carbohydrates: 26.8 g
- Fiber: 1.1 g
- Protein: 4 g
- Cholesterol: 0 mg
- Prep Time: 5 minutes
- Category: Helpful Guides


This was very helpful.
Learn how to make your own self-rising flour at home with this simple guide. With just a few ingredients, you’ll have a pantry staple for all your baking needs.
Can whole wheat flour be used?
Yes!